If you’re a pro tech, a small shop owner, or even a gearhead who’s got their work routine pinned to a good tool cabinet, you know how brutal it is when that cabinet gets banged up—dropped wrenches, slammed drawers, slamming doors that’ve taken a few too many garage floor spills, and suddenly your go-to storage is looking beat. I’ve been knee-deep in tool cabinet land for years, and as a supplier (yes, the one with the solid builds that hold up to daily chaos), I’ve seen every kind of damage: loose drawer slides, dented side panels, wonky hinges, even that annoying sticky lock that’s stopped working mid-project. The good news? Most of these aren’t total write-offs—you can fix a lot of them in an afternoon with basic stuff you probably already have lying around. Let’s break this down like we’re talking shop, no fancy jargon, no overcomplicating things.
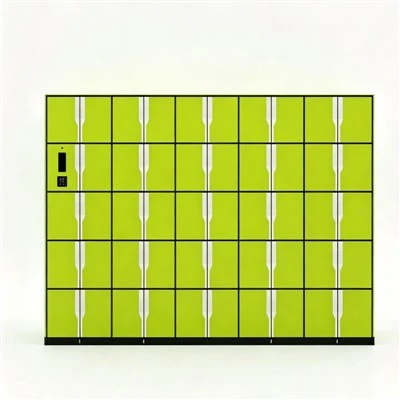
First off, though, a quick reality check: not every damage is the same, and some fixes are quick swaps, others need a little more patience. Before you grab your screwdriver, take 5 minutes to do a walkaround. Open every drawer, test every hinge, run a finger along the sides and bottom, and note what’s actually wrong. Is it just a loose drawer that slides crookedly? A dented side that’s cramping your style? Or is it a bigger issue, like a bent frame from moving it too fast? For most small to mid-sized tool cabinets (the workhorse ones people use every day), you can handle 90% of fixes at home without calling a pro. And hey, if you’re thinking “maybe I just replace it” instead of fixing, I get it—sometimes a fresh build makes sense. If you go that route, we’ve got options, from our heavy-duty smart cabinets that track your tools so you never lose a socket, to our RFID-equipped smart lab storage for those precision bits that need extra care, like this Smart Tool Cabinet that’s built to take a hit, and this Smart Lab Equipment Storage Cabinet with RFID for your delicate gear. But let’s say you want to fix what you’ve got—let’s dive in.
The most common damage by far? Drawer slides that are loose, sticky, or just not working right. Let’s be real—drawers get opened and closed hundreds of times a month, so their slides take a beating. First, yank the drawer all the way out (most slides have a little lever at the back you press to release it, so don’t yank hard and break the drawer or the slide). Once it’s out, inspect the slides: metal slides (the standard on most tool cabinets) might have built-up gunk—oil, dust, grease from the shop—that makes them sticky. Grab a clean rag, a little WD-40 (or even dish soap and warm water if you hate spray chemicals), and wipe every part of the slide, inside and out. If there’s rust spots? A little steel wool to scrub them off, then wipe dry and reapply a thin layer of lubricant (not too much—you don’t want it dripping on your wrenches) to keep them moving.
If the slide itself is loose, that’s the next fix. Look at where the slide attaches to the cabinet frame and where it attaches to the drawer’s side. Those screws get loose over time from slamming drawers or just regular use. Grab a Phillips head screwdriver (most standard) and tighten them up. If the screw holes are stripped (that’s when the plastic or metal frame around the screw is all mushy and the screw won’t grip)? Don’t panic—grab a toothpick or a small wooden dowel, dip the end in wood glue (or even just a little Elmer’s glue if it’s not structural), shove it into the stripped hole, break it off flush when it’s done, then re-drill a tiny new hole for the screw. That’s a trick every mechanic and shop owner swears by, works way better than buying a whole new frame for a $5 screw. One quick note: if your cabinet is a heavier-duty model, maybe the slides are ball-bearing ones? Same process, just make sure you’re using the right screwdriver so you don’t strip the screw even more.
Next up: dented panels. I’ve seen everything from tiny dents from a falling hammer to big craters from a dropped toolbox. For small dents (less than a quarter size), this is easy. Grab a hair dryer (the kind you use for your hair, no fancy tools) and set it to hot. Hold it 2-3 inches away from the dent for 1-2 minutes—metal expands when heated, so that dent will pop right out. If it’s a plastic panel? No hair dryer needed, try this: grab a bucket of hot (not boiling) water, pour it over the dent, then push the dent gently from the inside. Wait, wait—wait a second, only do that if the panel is accessible from inside. If it’s a side panel that’s not hollow, skip that. For bigger dents? If it’s a metal panel, you can sand the dent down, apply some auto body filler (the cheap kind from auto parts stores works), smooth it out, sand it flat, then spray a matching paint. Don’t have matching paint? A little marker that’s close to the cabinet’s color works for small touch-ups, or grab a spray can from a hardware store—most have standard tool cabinet colors. If you’re worried about messing up the paint, or if the dent is on a higher-end smart cabinet, like the Smart Tool Cabinet we make which has a powder coat finish that’s durable, maybe a pro does it, but for a regular work cabinet, this is DIY doable.


Hinges are another big one. Drawer hinges, door hinges, whatever—they start squeaking, get loose, or the door won’t close right. First, same as drawer slides: check if the screws are loose. Most of the time, tightening the hinge screws (the ones attaching the hinge to the cabinet frame, and the ones attaching to the door) fixes it. If the hinge is bent? That’s a problem. Grab a pair of pliers and bend it back slowly—don’t yank hard, you’ll break the metal. If bending doesn’t work, most standard hinges are cheap and easy to replace—you can pick up a pack at any hardware store, no need to buy the whole cabinet. One pro tip: when replacing hinges, mark where the old ones were so the new ones line up the same, so your door doesn’t hang crooked.
What about locks? A stuck lock is the worst—you’re mid-project, need that socket set, and the lock won’t turn. First, don’t jam the key harder—that just makes it worse. Wipe the key clean with a rag, then spray a little graphite lubricant (not WD-40—WD-40 is oil-based and will attract dust, making the lock stick more) into the keyhole. Insert the key and turn it back and forth a few times, gently. If it still won’t work, take the lock off (most are held in with two small screws) and spray it inside, then put it back. If all else fails, most standard tool cabinet locks are universal, so you can swap it out in 5 minutes. For our higher-end smart cabinets, like the Smart Lab Equipment Storage Cabinet with RFID, the locks are electronic, so if you’re having issues there, it’s a different process—check the manual or reach out, but that’s why we make those for precise use, so you don’t have to mess with manual lock headaches.
Wait, what about if the whole cabinet frame is bent? That’s a bigger issue, usually from moving it or dropping a heavy tool on it. First, set the cabinet on a level surface—use a level to check each side. If one side is leaning, you can adjust the feet (most cabinets have adjustable feet at the bottom) to level it out. If the frame is actually bent, metal is pretty malleable if you use a little force. For a side frame that’s bent inward, grab a long piece of wood, press it against the bent area, and use a mallet to gently tap it back into place. Don’t use a steel hammer—you’ll make more dents. For a frame that’s bent outward, you can use a clamp to pull it back straight, then leave the clamp on for an hour to set. If it’s really warped, that’s when you might consider replacing, but again—for most everyday cabinets, adjusting and tapping works.
A few other small fixes that people overlook: sticky drawers that aren’t from gunk. Sometimes the drawer’s side rubs against the cabinet frame because it’s slightly crooked. Take a piece of fine-grit sandpaper and gently sand the edge of the drawer that’s rubbing—just a tiny bit, so it fits back in smoothly. Don’t sand too much, though, or the drawer will be loose. And if you have a wood cabinet (some higher-end ones are wood), not metal? The process is almost the same, but watch out for wood swelling from moisture—if it’s in a damp garage, leave a little gap between the drawer and frame to prevent that.
Now, a quick note on when to call it quits with repairing. If the frame is so bent that the cabinet won’t sit level, or if the drawers are falling off their slides no matter what you do, that’s when a new cabinet makes sense. And if you’re in the market for a new one, we’ve got you covered—whether you need a basic workhorse or something with smart features to keep your tools organized, from the Smart Tool Cabinet that’s built for heavy use, to the Smart Lab Equipment Storage Cabinet with RFID for your sensitive gear. No need to stress over losing tools or dealing with constant repairs when a good cabinet is worth the investment.
I’ve been in this game long enough to know that a lot of people underestimate how long a tool cabinet lasts if you take care of it. A little fix here and there every few months is way cheaper than buying a new one every year. The biggest thing is not ignoring small damage—tightening a screw now is way easier than fixing a bent frame later. And if you do run into something that feels too tricky, don’t hesitate to reach out. I’m not just a supplier—I’m someone who’s worked in shops, so I get the frustration of a broken tool cabinet holding you up on a project.
When you’re ready to grab a new cabinet, or if you have questions about repairs, feel free to connect. We’re here to help with everything from DIY tips to picking the right cabinet for your needs, no pressure, no sales hype—just honest advice for people who use tools every day.
References:
- Tool & Equipment Storage: Repair and Maintenance Guide, DIY Network, 2023.
- Smart Storage Solutions for Professional Workshops, Industry Report on Tool Cabinet Durability, 2024.
- Basic Hardware Repair for Workshop Equipment, Family Handyman, 2022.